Calendly Tutorial
Calendly Online scheduling
Looking for an extensive and descriptive guide to know about the basic and advanced tools of Calendly? You are at the right stop. We bring you everything there is to know about Calendly so that you can explore and exploit all the features of this online appointment scheduling system smoothly.
For advanced users we published major How to use Calendly.
Also, if you are wondering how calendly integrates with other softwares, we have a writeup on 11 Major Calendly Integrations.
Calendly App
We all have a hectic schedule of work where every single task is to be performed in a jam-packed time-table and every meeting to be attended in the definite time slot. Then there are different calendars for your work, home and party which you have to maintain separately. In addition to that the emergency commitments or cancellations make it all agitating to soldier through.
In such cases, we deploy smart work instead of hard work just to get a little space for ourselves. There are different Online Appointment Scheduling Systems that manage your multiple calendars, let your client book meetings and appointments from your busy schedule or cancel them without having to communicate with you back and forth. It is like having a virtual assistant at your behest.
Calendly is one of the most recommended Online Appointment Scheduling System that offers a wide range of appointment tools. These tools are significantly helpful for your clients as well as the business as they aim for saving time and effort.
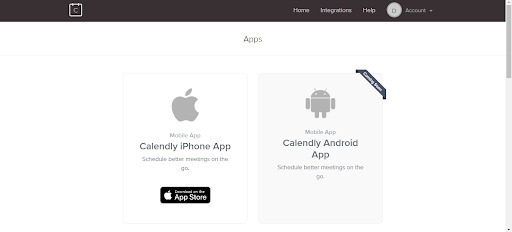
Calendly Mobile App
Calendly, for many years, has been a web-based Online Appointment Scheduling system but now it is available as an iOS mobile app to provide more comfort to the users. It is as simple as going to the Apple App Store, searching for Calendly and downloading it.
All the features that are present in the system as a web page are now transported to the app with an added benefit of mobility. Now you don’t have to go to the office or access your work computer to schedule or reschedule your appointments. With Calendly mobile app you are just one tap away from doing it all on your iPhone.
On Calendly Mobile App, you can:
- Schedule/Reschedule/ Cancel Events.
- Sync your official calendars with your Calendly account.
- Share, Copy-paste link of your event on various platforms (Email, Message).
- Edit, Change or customize event setting as per your availability.
- See the history of past meetings, locations and descriptions.
Calendly Pricing
Calendly is quite inexpensive as compared to the other online scheduling systems out there in the market.
The different plans are:
A Free Version (Limited Features) A Premium Version of $8 USD per user per month A Pro Version of $12 USD per user per month It also has an option of 14 days of free trial to get a clearer idea of the paid versions of the system.
Calendly Free
Unlike many other Online Appointment Scheduling System, Calendly offers a free version for a lifetime for users. The ‘Basic’ version offers limited features but still can be beneficial for new startups with less client base and fewer fundings available. Calendly offers to upgrade from the ‘Basic’ version to ‘Premium’ or ‘Pro’ anytime you want.
The features offered are:
- 1 Calendar per user
- Integration with Gcal, Office 365, Outlook and iCloud, Intercom
- Booking unlimited events (A Star Point indeed) One event type
- Emailing notifications to clients
- Embedding Calendly to your website
Calendly Signup
Signing up to Calendly is no pain at all. It involves following the below steps:
Go to the official website of Calendly (Know that it is a web-based scheduling syst
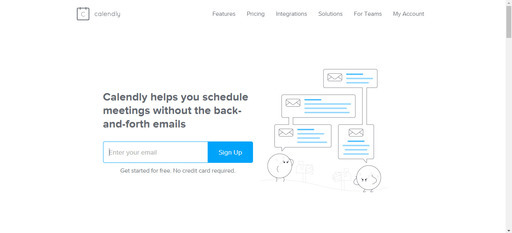
Enter in your email address and press ‘Enter’.
The next window will ask either to sign up with your Google or Office 365 account or enter your full name and security password separately. Fill in the details and press ‘Continue’.
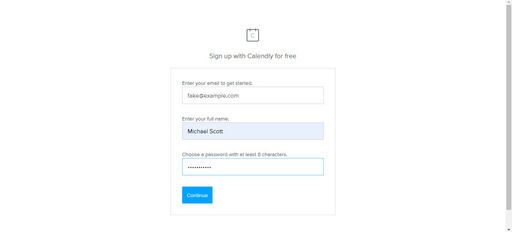
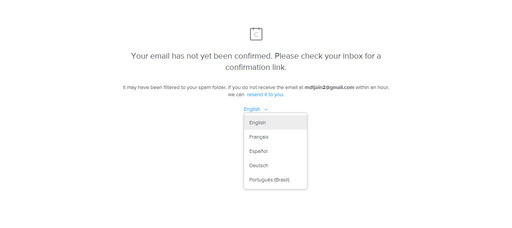
A confirmation link will be sent to your email address. After the confirmation, you can access Calendly. There are also a few options from which you can choose your language.
Calendy Login
Once you are signed up, you don’t need to log in again and again when you use Calendly, if you have chosen the option of ‘Remember your password’. Usually, the Cookies in the Calendly stores your login information and saves time and effort to input details on each login. The system asks your permission for accepting the Cookies in the very beginning.
If you want any change in your login information (email address or password). you can follow the below steps:
From your dashboard, click on the ‘Account’ section, a drop-down list will appear.
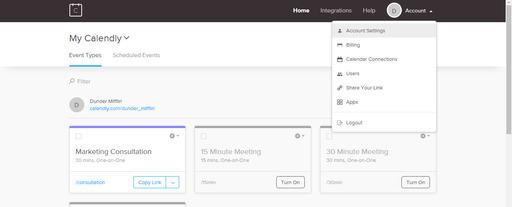
Select ‘Account Settings’ and choose the last option ‘Login’.
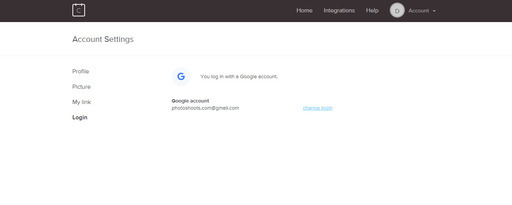
Click the blue link ‘Change Login’ and make needed modifications.
Know that the change in your email address will not alter your connected calendar.
Calendly Setup
This is how it goes down:
You create an account on Calendly and integrate it with your official calendar (Google Calendar, Outlook) where you decide your entire schedule.
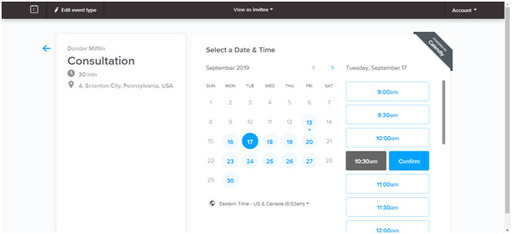
Define the type of services that are available, decide certain time slots and duration for which you can render those services for Eg. Marketing Consultation for 30 minutes.

Share the link with your clients and let them see when you are available for the meeting. They can choose the preferred time slot of meeting without having to disturb you.
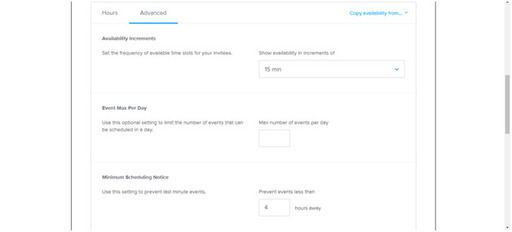
Customize your schedule with plenty of tools available. Add buffer times before and after the meetings, block the slots when you are unavailable and much more.
Organize your entire schedule with the help of this platform and maybe make a little time to meet yourself.
Calendly Dashboard
Calendly uses a white dashboard for a professional vibe. It is simple and on point without any bulky decor. The homepage consists of necessary fields that would make accessibility easy and smooth.
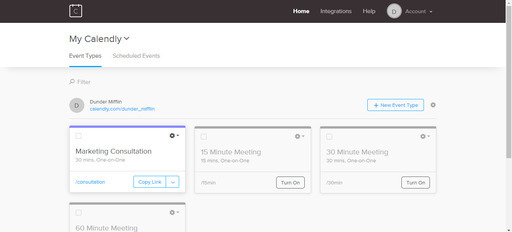
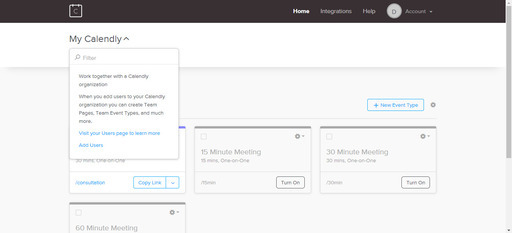
My Calendly
Under ‘My Calendly’, you would see events and event types that are related to you personally. Once you add multiple users to your system, you can also see other user’s event types and scheduled events by selecting their name from the drop downlist close to ‘My Calendly’ option.
Calendly Event Types
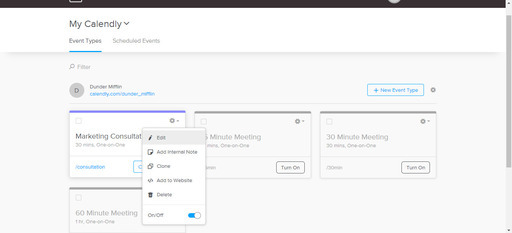
Under ‘Event Types’, you can see the name, type, location and duration of each event that you have created for your client. Any change in the events can be made through the setting gear icon present on each event.
The options are:
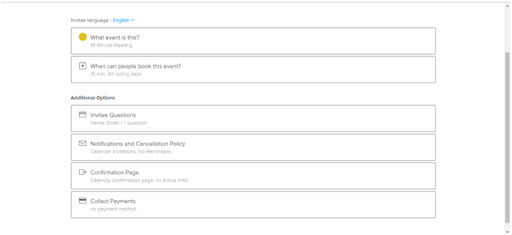
The ‘Edit’ Option gives you multiple options of customization where you can define the event type, the duration and timing slots, adding buffer time, information that needs to be filled by clients while booking an appointment, payment methods and many more.
The ‘Add Internal Note’ gives you a space to write down an appropriate description related to that particular event. Any relevant information that can be later referred to can be put in this section.
The ‘Clone’ option is to save time in creating another event with exact same customization. With ‘Clone’ you can copy the event and all the selected filters are automatically copied in the newly created event. Change the name and voila. The ‘Save to Template’ is useful to the admins of the system as it lets you different event types as your template. Templates are already set options that can later be assigned to different users when they join Calendly.
The ‘Add to Website’ lets you create a unique code and copy it to embed it in your official website. Clients can just click on the link from your business site and book the meeting. The ‘Delete’ option couldn’t be more precise. It eliminates the selected event type forever from your home page. Although if you already have an upcoming event scheduled of the said event type, it will remain intact.
The ‘On/Off’ option decides the visibility of the event to the clients while booking. If the option is ‘On’ then clients can access the booking link and make an appointment online. But if the option is ‘Off’ that means bookings of that event would not be shown to the clients.
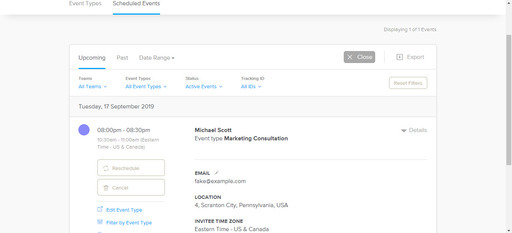
Under ‘Scheduled Events’, you can find upcoming events and past events. The different filters help you to categorize prior and future meetings as per your preference. The ‘Details’ button is to view the complete details and credentials of the client. Any information asked during the booking will be mentioned here.
Calendly Account
In ‘Account’ section there are various tools for your convenience:
- Account Settings
- Billing
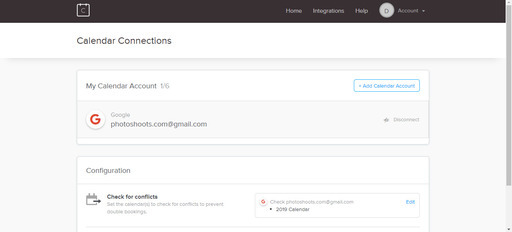
- Calendar Connections
- Users
- Share your link
- Apps
- Logout
Calendly Help
The Help section of Calendly is available on the dashboard of the page. When clicked, it opens up a separate window of Help Center where there are detailed descriptions about basic as well as advanced tools of Calendly. Most of the solutions provide a video tutorial for the easier and better understanding of the user. The search bar can be used to ask specific questions by typing in the keywords.
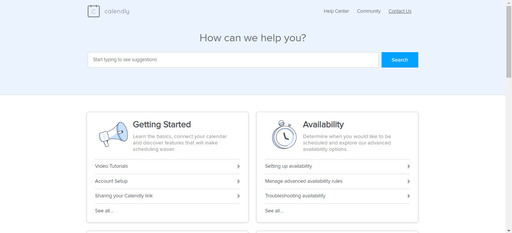
The ‘Community’ section of the Help Center is a forum to discuss, share, solve and suggest ideas and problems by different Calendly users. Many Question-Answers prove to be useful in solving user problems.
To directly ask any question or query from Calendly Team Member, you can click on the ‘Contact Us’ option.
If you are looking for a calendly alternative, Karen is designed to be a simpler solution than what calendly provides. We have written an in-depth article on how Karen is a better Calendly Alternative
If you have made this far, you must be interested in knowing more about scheduling, we have few more tutorials written about scheduling softwares, please read through the ones that you find interesting.
The Ultimate Acuity Scheduling Tutorial
The Ultimate ScheduleOnce Tutorial
Getting Started with Creating Doodle Polls
Advanced Guide on How to create a Doodle Poll
Related articles
Related Articles
Doodle Poll Alternatives and Competitors December 13, 2019
Calendly vs ScheduleOnce Feature and Pricing Comparison : 2020 May 20, 2020
Doodle Poll Tutorial and Doodle Reviews December 20, 2019
Calendly vs Setmore Feature and Pricing Comparison : 2020 May 12, 2020
How to use Calendly an Advanced Guide November 12, 2019